
AI Product Photography for Small Businesses: A Practical Guide
You do not need a studio to explore a new product-image direction. You do need a clear source photo, a specific brief and time to check the result. This guide walks through those decisions for a small shop.
5 free credits · No card required · No subscription required
What is AI product photography?
AI product photography uses a product image as a reference to generate a new image, such as a studio composition or a lifestyle scene. You describe the setting and the tool creates a visual interpretation. It can change the background, lighting and arrangement, but it can also change details you wanted to preserve.
Think of the output as creative that needs review. An attractive image is only useful for a product page if it still represents what you sell. Keep conventional photos for details that buyers need to inspect, including materials, dimensions and included parts.
Which small businesses can use it?
Makers, independent ecommerce shops and marketplace sellers can use AI scenes for supporting listing images, social posts and collection launches. It is particularly useful to explore a setting before investing in a physical set or to create a small batch of creative between shoots.
A candle maker could try a simple shelf scene for a new scent. A beauty brand could explore a plain backdrop for a bottle and box. A homeware shop could plan a consistent surface for a collection. Jewellery and accessories require careful checking of fine shapes and reflective details; food imagery needs checking for accurate portions and ingredients.
Choose the workflow for Etsy sellers, Shopify stores or small businesses creating occasional images.
Choose a suitable source photo
Use a photo of the actual item, with its full outline visible. A phone photo can be a useful starting point if the product is sharp, well lit and large enough to inspect. Avoid heavy filters: they can obscure the colours and materials you need the generated image to preserve.
- Place the product against a simple background and remove unrelated objects.
- Use even light that shows the shape without deep shadows hiding the edges.
- Clean the lens and check focus on the label or the most important product detail.
- Include the packaging only if it belongs in the final image.
- Use a source you have permission to upload and publish.
If the logo is unreadable in the original, do not rely on AI to reconstruct it correctly. Take a clearer photo first. For translucent glass or shiny metal, try a source with an uncluttered outline and check reflections carefully afterwards.
Write a brief for one placement
Decide where the image will appear before describing the scene. A product-page image needs a clear view of the item. A collection header may need room for a crop. A social ad needs a readable message as well as the product.
Specify the surface, background, lighting and framing. For example: “Place the bottle and box on a pale stone surface, with a plain sage background and soft side lighting. Keep the whole product visible and leave space around it.” This is an example brief, not a guarantee of the generated result.
Start without extra props or complicated text. Once the basic composition works, try a controlled variation. Changing everything at once makes it harder to see which part of the brief helped.
From product reference to a styled image
These existing Grafikarta demo images show a botanical face-oil bottle and box in two settings. Compare the packaging and label before choosing a generated result.
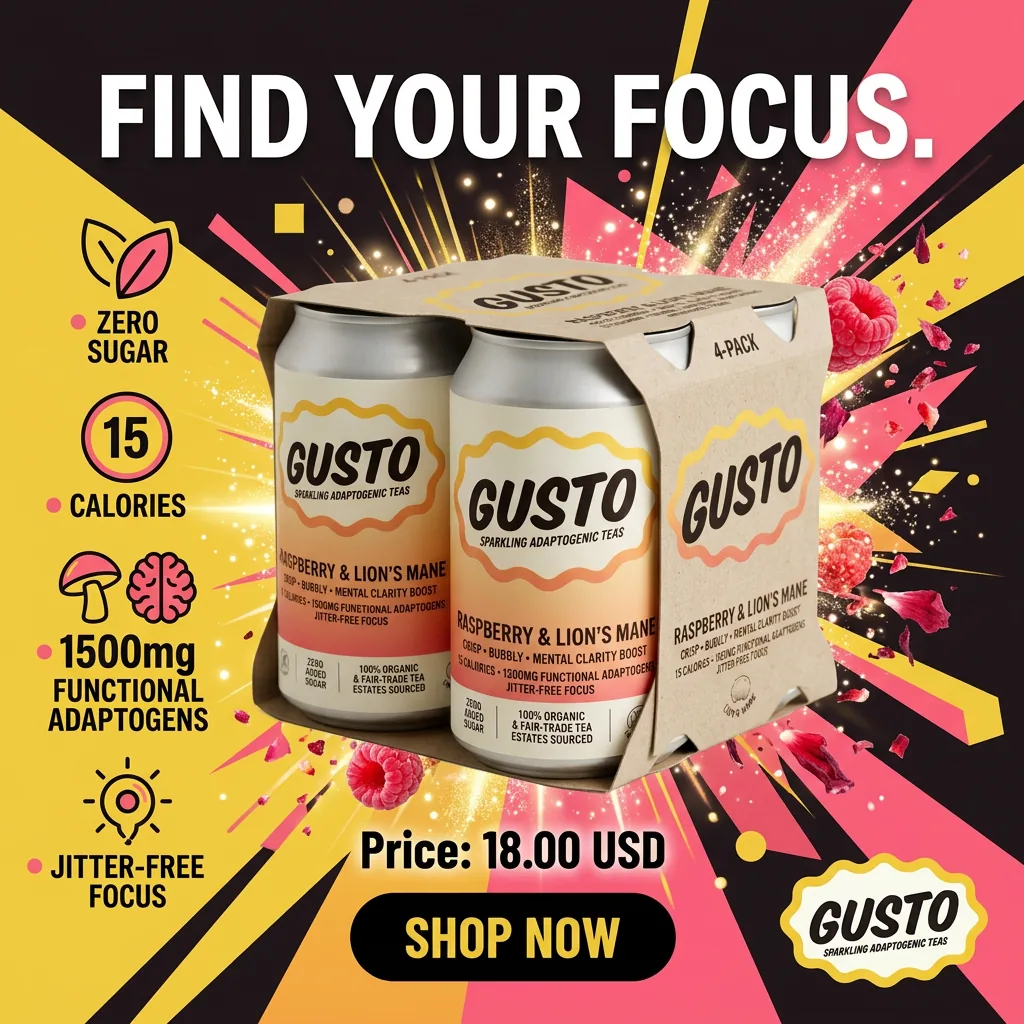
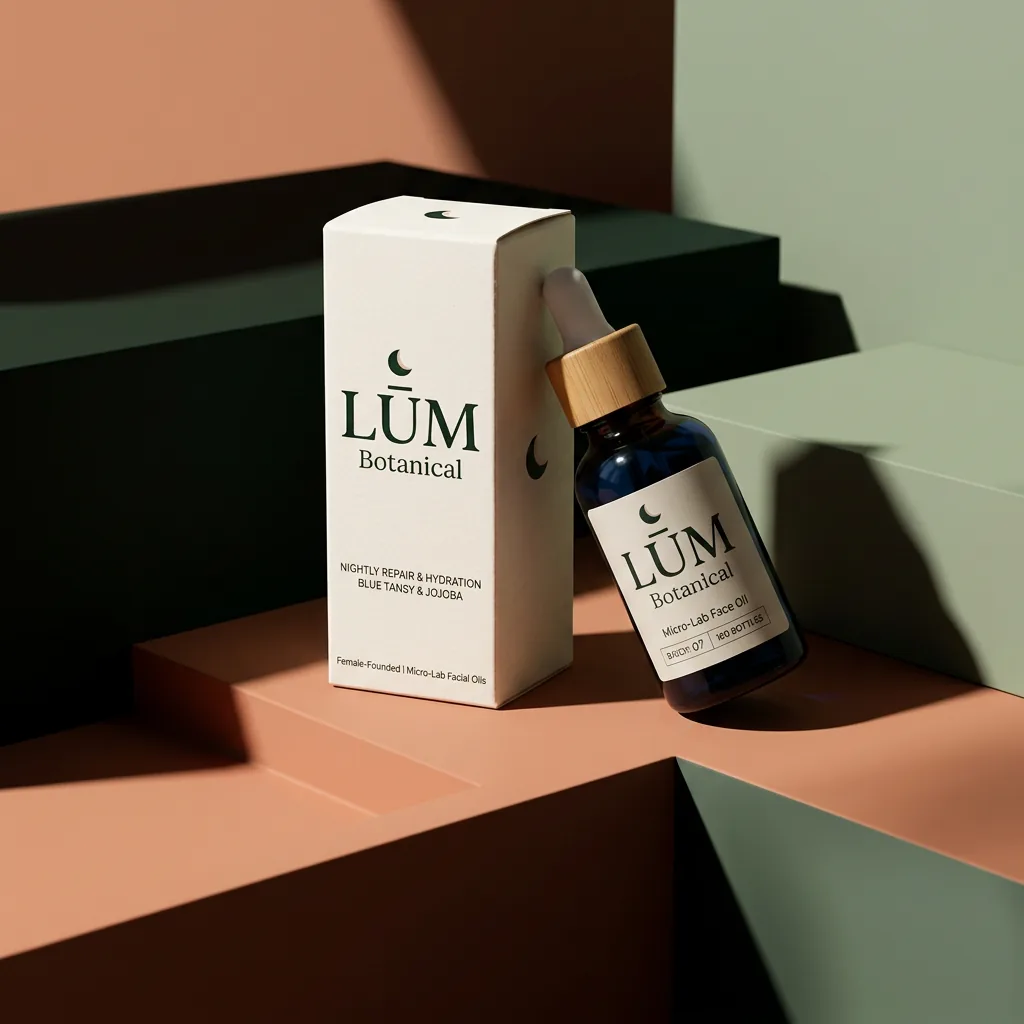
A short example in Grafikarta
- Upload a clear photo of your product, such as a bottle beside its box.
- Choose product shot generation and describe a surface, background and lighting. No design experience is required.
- Check the credit cost and generate one image first.
- Compare the bottle shape, cap, logo and packaging text with the source. Inspect both at full size.
- Download a result that accurately represents the item. If details changed, adjust the brief, try again or use your original photo.
The demo above illustrates the kind of scene change you can explore. It is not a customer result or a claim that every product will generate the same way. See the AI product photography workflow for more context.
Common mistakes to catch before publishing
- Altered product details: inspect logos, labels, closures, handles and item counts.
- Misleading scale: a prop can make a small product look much larger. Use a real scale photo where size matters.
- Invented extras: remove accessories or packaging that are not included in the purchase.
- Overloaded scenes: too many props can hide the item, particularly in a mobile thumbnail.
- Unreadable ad copy: check every word and factual claim. Do not publish invented offers, certifications or benefits.
- Generating a batch too soon: approve one direction before spending credits on more versions.
Keep the source file and your approved output together. That gives you an easy comparison if you reuse the image later or update the product packaging.
Product images and social ads have different jobs
Use product shots to show the item clearly. Use lifestyle scenes to suggest a setting, with care around scale and included items. Use ecommerce graphics for a checked product message, and use image ads for one specific announcement or offer.
You still publish through your own shop or advertising account. Grafikarta does not automatically update Etsy listings, sync Shopify products or buy advertising. Read the product ad generator guide when you are ready to create social ad assets.
Pay as you go or subscribe?
Count the creative tasks you actually have in a typical month. If you work around seasonal launches or occasional restocks, buying credits when needed can fit better than a recurring plan. If you create frequently, compare a monthly allowance with your expected usage and its expiry rules.
Check image resolution costs as well as the headline credit count. Leave room for revisions: an image you decide not to use still took a generation. Compare pay-as-you-go AI image generation with the current optional monthly plans.
Where Grafikarta fits
Grafikarta is an AI creative tool for small product-based businesses. It creates product shots, ecommerce images and social ads from your product reference. You supply the real product and brief, and you decide whether the result is accurate enough to publish.
It is a way to make and explore creative, not a substitute for checking product facts or a promise of better sales. For account, format and generation questions, read the Grafikarta FAQs.
Try it free, then pay when you need more
Start with 5 free credits. No card required. Free credits expire after 14 days. A 1K image uses 1 credit; a 2K image uses 2 credits.
No subscription required. Pay-as-you-go credits last 365 days. Optional monthly Creator and Pro plans are available.
Paid prices are shown in US dollars (US$). See current US$ pricing and plan allowances before buying. The app shows the credit cost before you generate.
Start with one product photo
No design experience is required. Try a small first brief and check the result before publishing.